Devops Project 2: CI/CD
Github Actions CI/CD - Everything you need to know to get started

In today’s fast-paced environment, it’s absolutely essential that we can automate the testing and delivery of our code.
That’s where GitHub actions comes in.
It’s the built-in, CICD tool for GitHub, if you’re unfamiliar with what CICD is it stands for continuous integration and continuous delivery.
Essentially it allows us to automate the testing of our code to make sure it meets certain criteria after all the tests are passed you can enable actions to automate the delivery of your code.
This can significantly reduce the time it takes for you to deliver updates your application, which allows developers to focus more of their time on the code itself.
What is GitHub Super Linter
The Super Linter is a source code repository that is packaged into a Docker container and called by GitHub Actions.
This allows for any repository on GitHub.com to call the Super Linter and start utilizing its benefits.
The Super Linter will currently support a lot of languages and more coming in the future.
How it works
When you’ve set your repository to start running this action, any time you open a pull request, it will start linting the code case and return via the Status API.
It will let you know if any of your code changes passed successfully, or if any errors were detected, where they are, and what they are.
This then allows the developer to go back to their branch, fix any issues, and create a new push to the open pull request.
At that point, the Super Linter will run again and validate the updated code and repeat the process. You can configure your branch protection rules to make sure all code must pass before being able to merge as an additional measure.
Videos to create Github Actions CI/CD Q2 Show & Tell
Instructions
1.Create new repository, click + new and name whatever you want
2.Select public (if you want the public to view your project)
3.Scroll down select add a README file, click create repository button
4.Create a workflow, click add file button and select create new file, be very specified when comes to naming the file
Type the proper directory in this format: .github/workflows/superlinter.yml (name whatever you want and copy and paste the code (from superlinter.yml) in the blank space and commit this file to the main branch.
Warning: if workflow is not triggering which means the format or spelling error naming the workflow file
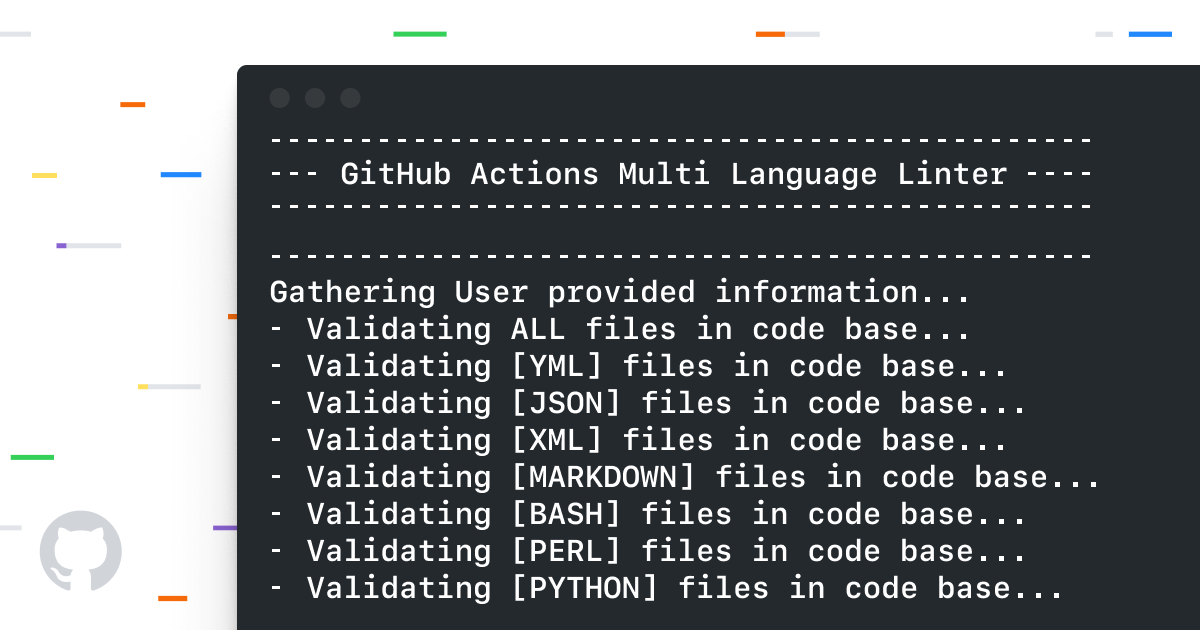
The code (from superlinter.yml) paste, its purpose is to listening for a push event, when the push event happen, it’s going to first check our code and than run superlinter against it to make sure it conforms to the linting standards.
If there’s error in the code, it will update you and send you an email that is link to your github account.
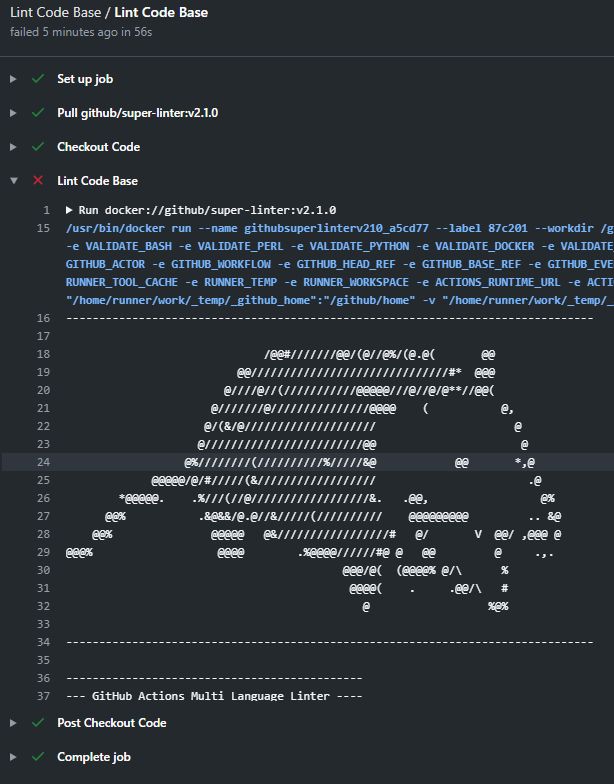
5.Go to the main repository in the middle of the page there’s status icon colour in yellow (it is currently running the workflow and checking the code. If the check fails, it’s going to turn red.)
6.You can click actions tab to see it is running the workflow and it’s running super linter
If you click the Lint code base and open the file you can see it is linting the code base.
When you open up you can see the process that it’s on.
(You can see set up job. (Doing Github Action Stuff setting up everything up)
Scroll down it will show you it is pulling the code from github superlinter (Pull ghcr.io/github/super-linter:v3.14.5 -this url version can be different from your github account)
Once it’s done. It’s going to run our code in the repository and it’s going to run the super linter again. (This is pretty cool it’s telling you behind the scenes which code repository if pulled from.)
If you click this url: ghcr.io/github/super-linter:v3.14.5 you can see the actual code of the super linter job.
Checkout code
Run Super linter against it
It will show the logs.
Checkmark(tick) to show all the checks pass.(Green tick means all the workflows has passed)
This Superlinter can be use for downstream.
If you have a servers monitor the Github API and check the status of the repository. If the status is green check mark, it automatically go to that repository and pull down the code to implemented into staging or production or whatever you want.
7.Push python code to run & test any error for python code
8.Create new file (paste the python code) the file as main.py (scroll down and commit it) and let the linter run it
9.Refresh the page to check
Instructions to create Github Pages
1.Create new repository, click + scroll down select new repository
2.Create name(any name you like) for the repository
3.Select public
4.Select initialize this repository with a README
5.Click create repository
6.Enable Github pages go to settings scroll down to the github pages section, select the source as main than save
7.Scroll down to github pages sections to get the url and the github pages sites is ready instantly
8.Go back to the repository and select README.md Start this step from here to edit github pages and ignore step 1 to 7
9.To overwrite create new file
10.Type <h1>Hello World</h1>, name the file as index.html
11.Scroll down type create homepage under the commit new file section,select commit directly to the main branch and click commit new file
12.Refresh the website to see the changes
13.Go to repository setting buttons scroll down to the github pages section, click the choose a theme button to choose a theme for the website
14.Delete index.html file click commit changes button to commit, refresh the webpage
15.Open README.md is a markdown file to replace your own content for the webpage by click the pencil button on the top right, scroll down to click commit changes button for the updated content of the webpage
16.config.yml file will reflect the theme of the design of this website
Related Videos to create Github Pages Website Q2 Show & Tell